What's new?
'Alerts' tab added to the main platform navigation bar
Why does it matter?
The alert button has come about as a replacement to our status page, which previously was where we announced all our scheduled maintenance and any on-going issues.
The introduction of the alert button is a result of our decision to replace the software status page. We have noticed a low percentage of active users signing up for the status page, so we have decided to retire it. Rest assured; subscribers will be notified when this takes place. Instead, we have introduced Alerts within the system. These alerts will notify all logged-in users about scheduled maintenance and other important information that we want to convey to our end users.
How it works
The new icon will be visible on all users' dashboards, as well as on referral records and in the search area. This means that it will always be in sight, even if you're away from the dashboard icons, whenever a new alert appears.

Activity Administrators, Scheme Administrators & Super-Scheme Administrators, will all be able to see Alerts with have access to the same information in this area.
Just like the Messages button, the Alerts button will change its colour to indicate the availability of a new alert. Positioned at the far-right of the dashboard, it will be easily noticeable when a new alert is published.

The yellow colour of the icon will indicate there is a new, informational Alert, ready to be viewed by the user.
These alerts will primarily consist of notifications regarding scheduled maintenance or any other updates that do not have a direct impact on the functionality of the platform.

If the Alert icon turns red, it means there is a potential issue that may affect your ability to use the platform. You can find detailed information about the issue in the alerts area, which will help you understand its impact.
Understanding the Alerts page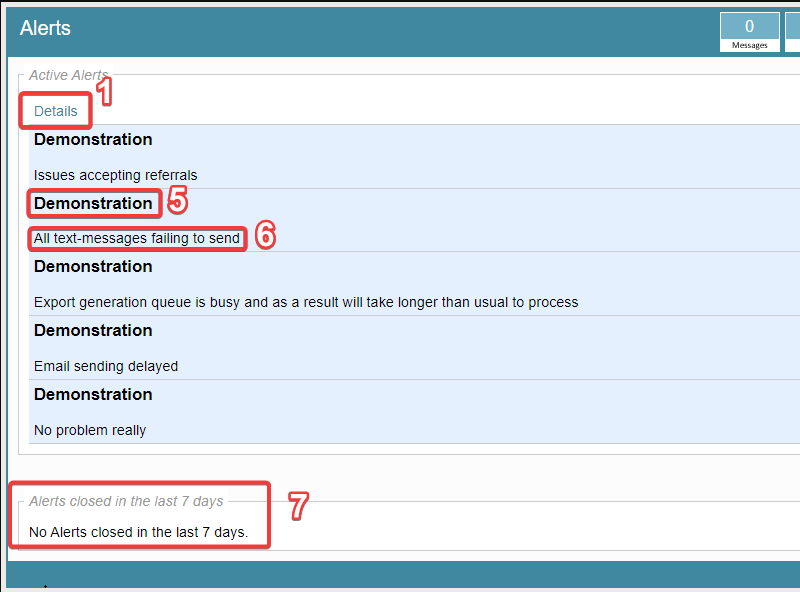
The details section [1] shows under it both the header / title [5] and the description [6] of the alert that has been published.
Alerts appear in this upper section when they are active, resolved alerts will then be in the lower section [7] removed after 7 days since they have been resolved.
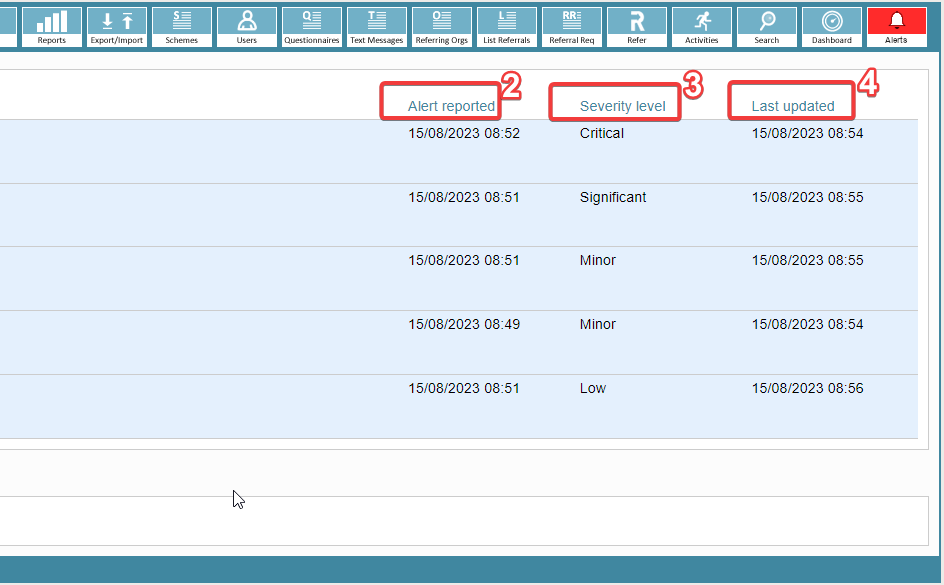
On the right-hand side, you can see when the alert was reported [2], when the alert was last updated (had new notes added, status changed, etc.) [4]
Finally, you can see what level of severity this alert is [3], where the yellow icon will always report that it is informational, a red icon could be Low, Minor, Significant or Critical.
What's new?
Referral record: Mark patient as deceased
Why does it matter?
Marking a patient deceased allows for an easy way to remove all contact consents from a single patient across multiple referrals within a single Scheme Provider.
This feature is particularly useful when there are multiple schemes in use and clients have been referred between them. You can mark any of the referral records and it will also mark all the referrals as deceased.
How it works
On the patient's referral record, there is a new button.
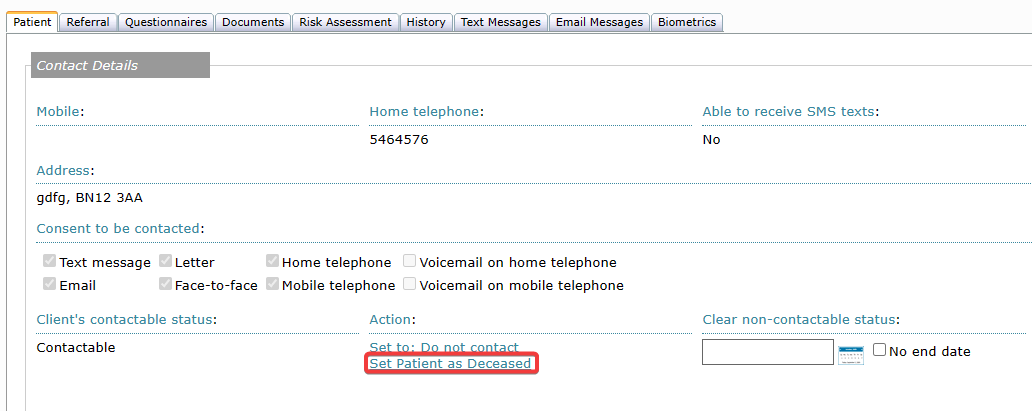
Once clicked, it will list all the schemes where the participant will be marked as deceased.

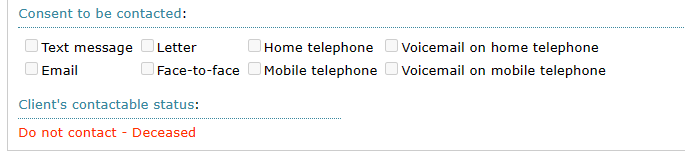
This action will revoke all consents and indicate that the patient is deceased, ensuring they will no longer receive any communication.
This action cannot be undone as the system does not keep a record of the patient's consent statements. If you need to re-enable their consents due to a mistake, the participant will need to be contacted directly.
For this reason, only Super Scheme Admins can use this feature and by default it is an explicit permission so it will need to be requested before we enable it on accounts.
What's new?
Gladstone Software Integration
Why does it matter?
ReferAll's latest integration with Gladstone software streamlines the process of removing the need to duplicate information in both systems. With just one click, the integration will automatically create the necessary entry in Gladstone and prompt the end user to create their Gladstone account if they don't already have one. This saves valuable time and ensures a seamless experience for Scheme Admins.
If an email match is found, the membership ID will display in the referral record after saving the new referral. See * for details of required fields.
How it works
To create a users account in Gladstone, there is a new button on the patient's referral record, when clicked, this will create the account in Gladstone and send the patient an email to finalise setup.
The patient will require an email address, so if they do not have one you will encounter the error below. To amend this, you can select the 'Edit' button on the bottom-right of the patient record and then update their email field before saving.
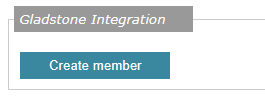
After refreshing the page, you will have the option to click on 'Create member'.

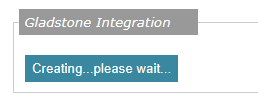
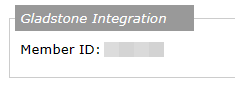
After clicking the button, it will momentarily disappear and then display the user's 'Member ID' number.
Here is an example of the email that the patient will receive in their inbox.
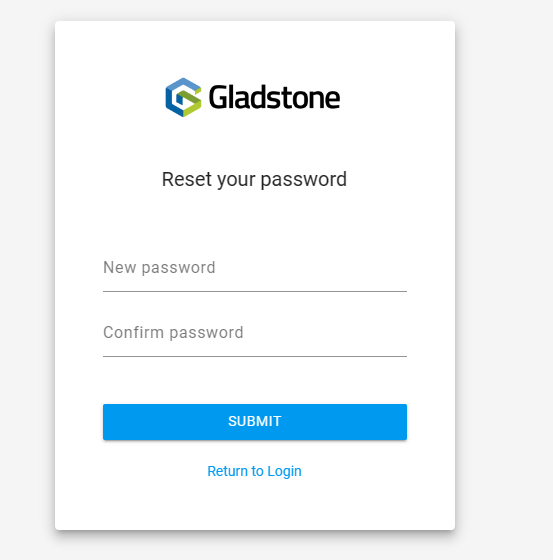
To access their account and log in, they will need to click on the link provided at the bottom and set a password.
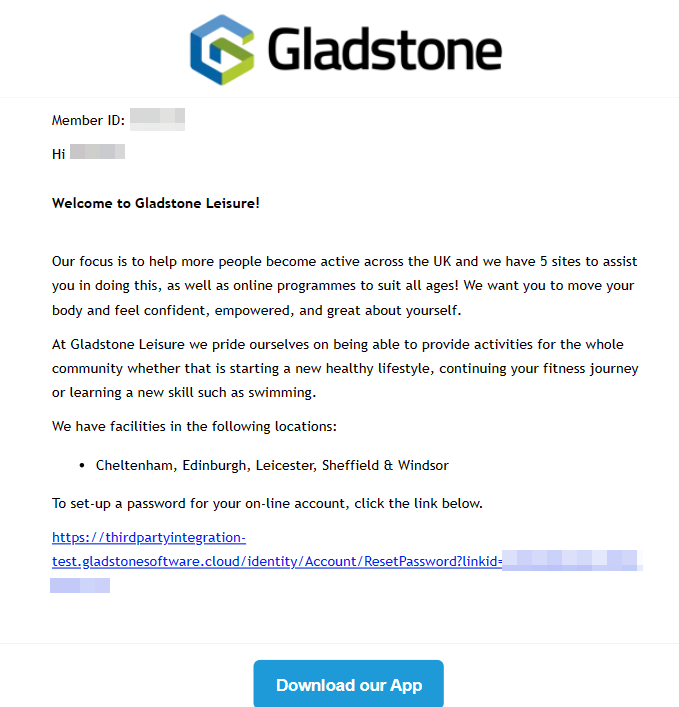
The password needs to be 8 characters long, with a capital, number, and a symbol. Once created, it will then redirect you to login to the Gladstone system.
If you are a Gladstone software customer, this will not be enabled automatically.
You should contact the support team on support@refer-all.net and request that we connect you to the Gladstone API.
Before enabling the Gladstone software integration, it is important to note that all customers must be using the Gladstone Go platform. If your organisation has not yet transitioned to the cloud platform, your Gladstone account manager will discuss the process with you.